Discover the , functioning, troubleshooting, , and safety precautions of an air brake system diagram for trucks. Ensure safe operation through proper training, regular checks, and reporting malfunctions.
Components of an Air Brake System Diagram
The air brake system diagram consists of several key components that work together to ensure the safe and efficient operation of a vehicle. Let’s take a closer look at each of these :
Air Compressor
The air compressor is a vital part of the air brake system. It is responsible for pressurizing the air tanks, which in turn provides the necessary power for the braking system to function effectively. The air compressor draws in air from the surrounding environment and compresses it to a high pressure before sending it to the air tanks.
Air Dryer
The air dryer plays an important role in maintaining the quality of the air in the system. It removes moisture and contaminants from the compressed air before it enters the air tanks. This is crucial because moisture can cause corrosion and other damage to the brake components. The air dryer ensures that the air in the system is clean and dry, allowing for optimal brake performance.
Air Tanks
The air tanks serve as storage units for the compressed air generated by the air compressor. They are typically located on the vehicle chassis and come in various sizes depending on the vehicle’s braking requirements. The air tanks store the pressurized air until it is needed to apply the brakes. They also help regulate the pressure in the system, ensuring a consistent and reliable braking response.

Brake Pedal
The brake pedal is the primary input device used by the driver to control the braking system. When the driver presses down on the brake pedal, it sends a signal to the brake chambers, initiating the braking process. The brake pedal is designed to be ergonomic and responsive, allowing for precise control over the braking force applied to the wheels.
Brake Chambers
The brake chambers are responsible for converting the compressed air into mechanical force to engage the brakes. They consist of a diaphragm and a pushrod assembly. When the air pressure from the air tanks is applied to the brake chambers, it pushes the diaphragm and extends the pushrod. This, in turn, activates the brake shoes or brake pads, causing them to make contact with the brake drums or brake rotors.
Brake Drums
The brake drums are found on the wheels of the vehicle and play a critical role in the braking process. When the brakes are applied, the brake shoes press against the inner surface of the brake drums, creating friction. This friction slows down the rotation of the wheels and brings the vehicle to a stop. Brake drums are designed to dissipate heat effectively, ensuring that the braking system remains efficient even during prolonged or heavy braking.
Brake Shoes
The brake shoes are the that make direct contact with the brake drums. They are typically lined with friction material, such as brake lining or brake pads, which provide the necessary grip to slow down or stop the vehicle. When the brakes are applied, the brake shoes are forced outward by the brake chambers, causing them to come into contact with the rotating brake drums. The friction generated between the brake shoes and the brake drums is what enables the vehicle to decelerate.
In summary, the components of an air brake system diagram work together to ensure reliable and effective braking. From the air compressor that pressurizes the air tanks to the brake shoes that make contact with the brake drums, each component has a crucial role in the overall functioning of the system. Understanding these components and their functions is essential for maintaining and air brake systems effectively.

(Note: The information provided here is a comprehensive overview of the components of an air brake system. For more detailed information on each component, please refer to the corresponding sections in the “Reference” provided.)
Functioning of an Air Brake System Diagram
Pressurizing the Air Tanks
The pressurization of the air tanks is a crucial step in the functioning of an air brake system diagram. It ensures that there is enough compressed air available to power the brakes when needed. The process begins with the air compressor, which is responsible for generating the necessary air pressure.
The air compressor, typically driven by the engine, draws in outside air and compresses it. This compressed air is then sent to the air dryer, which removes any moisture or contaminants that could potentially damage the system. Once the air is dried, it is stored in the air tanks.
The air tanks act as reservoirs, holding the compressed air until it is needed. These tanks are usually made of steel and have a specific volume capacity. The air pressure in the tanks is regulated by a governor, which ensures that it remains within safe limits.
Overall, pressurizing the air tanks involves the coordinated operation of the air compressor, air dryer, and air tanks. This ensures that the air brake system has a sufficient supply of compressed air to function effectively.
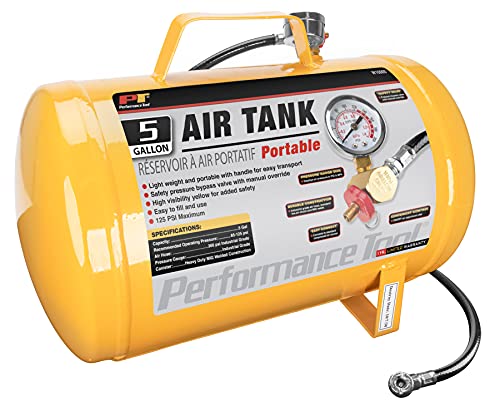 Performance Tool W10005 Hi-viz 5-Gallon Horizontal Portable Air Tank With Tire Air Chuck , Yellow
Applying the Brakes
When it comes to applying the brakes in an air brake system diagram, several components work together to bring the vehicle to a stop. The process begins when the driver presses the brake pedal, which is connected to a valve called the brake valve. This valve controls the release of compressed air to the brake chambers.
The brake chambers are responsible for converting the compressed air into mechanical force. They consist of a diaphragm that moves when the air pressure is applied. This movement, in turn, activates the brake shoes, which press against the brake drums.
The brake drums are attached to the wheels and rotate along with them. When the brake shoes press against the drums, friction is created, causing the wheels to slow down and eventually stop. This process is repeated for each wheel, ensuring that the vehicle comes to a complete halt.
Releasing the Brakes
After the brakes have been applied and the vehicle has come to a stop, it is necessary to release the brakes to allow the wheels to rotate freely again. Releasing the brakes is a simple yet important step in the functioning of an air brake system diagram.
To release the brakes, the driver releases the pressure on the brake pedal. This action sends a signal to the brake valve, which opens and allows the compressed air to escape from the brake chambers. As the air pressure decreases, the brake shoes move away from the brake drums, releasing the friction and allowing the wheels to rotate freely.

It is important to note that the release of the brakes should be done gradually and smoothly to avoid any sudden movements or jerks. This ensures a safe and controlled release of the brakes, allowing the vehicle to resume its forward motion.
Controlling Brake Pressure
Controlling brake pressure is a crucial aspect of the functioning of an air brake system diagram. It allows the driver to have precise control over the braking power, ensuring a safe and smooth stop.
The brake pressure is controlled by the driver through the brake pedal. By varying the pressure applied to the pedal, the driver can adjust the amount of compressed air released to the brake chambers. This, in turn, determines the force applied to the brake shoes and the level of friction generated against the brake drums.
Having the ability to control brake pressure is essential in different driving conditions. For example, in slippery or icy road conditions, the driver may need to apply less brake pressure to avoid wheel lock-up. On the other hand, in emergency situations, the driver may need to apply maximum brake pressure for a quick and efficient stop.
Overall, controlling brake pressure allows the driver to adapt to different situations and ensures optimal braking performance. It is an important skill for every driver operating a vehicle equipped with an air brake system.

Troubleshooting an Air Brake System Diagram
The air brake system is a crucial component of any vehicle, ensuring safe and reliable braking. However, like any mechanical system, it can encounter issues that require . In this section, we will explore common problems that may arise in an air brake system diagram and discuss how to address them effectively.
Air Leakage
One of the most common issues in an air brake system is air leakage. This occurs when air escapes from the system, leading to a loss of braking power and potentially compromising the safety of the vehicle. Detecting and addressing air leakage promptly is essential to maintain the system’s efficiency.
To identify air leakage, perform a thorough visual inspection of the air brake system . Look for any visible signs of air escaping, such as hissing sounds, air bubbles, or oil stains. Pay close attention to the air compressor, air tanks, brake chambers, and brake lines.
Once you have identified the source of the air leakage, take the necessary steps to resolve the issue. This may involve tightening loose fittings, replacing faulty valves or seals, or repairing damaged components. It is crucial to follow proper procedures and use high-quality replacement parts to ensure long-lasting repairs.
Insufficient Braking Power
Another common problem that can occur in an air brake system is insufficient braking power. This can be a serious safety concern, as it can lead to longer stopping distances and increased risk of accidents. Addressing insufficient braking power promptly is vital to maintain the vehicle’s braking performance.
When faced with insufficient braking power, start by checking the air pressure in the system. Low air pressure can result in reduced braking effectiveness. Use a pressure gauge to measure the air pressure in the air tanks. Compare the measured value with the manufacturer’s recommended range to determine if the pressure is within the required limits.
If the air pressure is low, check the air compressor for any faults or malfunctions. Inspect the air dryer to ensure it is effectively removing moisture from the compressed air. Additionally, examine the brake chambers and brake shoes for any signs of wear or damage that may be affecting their performance.
In some cases, insufficient braking power may be caused by a malfunctioning brake pedal. Inspect the brake pedal mechanism to ensure it is functioning correctly and that there are no obstructions or restrictions that may impede its operation.
Address any identified issues promptly by repairing or replacing faulty components. Regular and inspection of the air brake system can help prevent and detect insufficient braking power before it becomes a more significant problem.
Excessive Brake Drag
Excessive brake drag is another issue that can arise in an air brake system. It occurs when the brakes do not fully disengage after releasing the brake pedal, resulting in increased friction and unnecessary wear on the brake components. This can lead to reduced fuel efficiency and potential damage to the braking system.
To diagnose excessive brake drag, conduct a visual inspection of the brake drums and brake shoes. Look for any signs of uneven wear, scoring, or excessive heat marks. Excessive brake drag can cause the brakes to overheat, leading to decreased braking performance and potential brake failure.
If you notice excessive brake drag, start by checking the brake adjustment. Improperly adjusted brakes can cause excessive friction and drag. Ensure that the brake shoes are properly aligned and adjusted to the manufacturer’s specifications. Adjust the slack adjusters as necessary to achieve the correct brake clearance.
In some cases, excessive brake drag may be caused by a malfunctioning brake chamber. Inspect the brake chambers for any signs of leakage or damage. Replace any faulty brake chambers to restore proper brake operation.
Regular cleaning and lubrication of the brake can also help prevent excessive brake drag. Remove any dirt, debris, or rust that may be affecting the smooth operation of the brakes. Apply a suitable brake lubricant to ensure proper movement and minimize friction.
By addressing excessive brake drag promptly and conducting regular , you can ensure optimal braking performance and prolong the lifespan of your air brake system.
Brake Overheating
Brake overheating is a serious issue that can compromise the effectiveness and safety of an air brake system. Overheating can lead to brake fade, reduced braking power, and potential damage to the brake components. Proper and preventive measures are essential to prevent brake overheating.
One common cause of brake overheating is excessive braking, particularly during prolonged downhill descents. Continuous and heavy braking can generate excessive heat, causing the brake to overheat. To prevent brake overheating in these situations, use engine braking techniques and downshift to lower gears to reduce the reliance on the brakes.
Another possible cause of brake overheating is contaminated brake fluid. Moisture or other contaminants in the brake fluid can lower its boiling point, leading to brake fade and overheating. Regularly inspect the brake fluid and ensure it is clean and free from moisture. Replace the brake fluid as recommended by the manufacturer to maintain optimal braking performance.
Additionally, inspect the brake drums for any signs of damage or wear that may be contributing to brake overheating. Replace any worn or damaged brake drums to ensure proper heat dissipation and prevent overheating.
Regular of the air brake system, including cleaning and lubrication of the brake components, can also help prevent brake overheating. Remove any debris or rust that may hinder the proper functioning of the brakes. Apply a suitable brake lubricant to minimize friction and heat buildup.
By addressing the causes of brake overheating and implementing preventive measures, you can ensure the longevity and reliability of your air brake system.
Maintenance of an Air Brake System Diagram
Proper is crucial for the smooth and efficient functioning of an air brake system. Regular inspection, cleaning and lubrication, brake adjustment, and replacing worn components are key aspects of air brake system . By following these practices, you can ensure the longevity and optimal performance of your air brake system.
Regular Inspection
Regular inspections are essential to identify any potential issues or signs of wear and tear in an air brake system. It is recommended to conduct inspections at regular intervals or as per the manufacturer’s guidelines. During the inspection process, you should pay attention to the following components:
- Air Compressor: Check for any leaks, unusual noises, or excessive oil consumption. Ensure that the compressor is operating within the specified pressure range.
- Air Dryer: Inspect the air dryer for any signs of contamination or moisture buildup. Clean or replace the desiccant cartridge as necessary.
- Air Tanks: Check the air tanks for any signs of corrosion, leaks, or excessive moisture. Ensure that the drain valves are functioning properly to remove any accumulated water.
- Brake Pedal: Test the brake pedal for proper operation and responsiveness. Make sure it is not loose or excessively worn.
- Brake Chambers: Inspect the brake chambers for any leaks, cracks, or damaged diaphragms. Ensure that the pushrod travel is within the recommended range.
- Brake Drums: Check the brake drums for any signs of wear, cracks, or heat spots. Measure the drum diameter and ensure it is within the specified limits.
- Brake Shoes: Inspect the brake shoes for even wear and proper lining thickness. Replace any worn-out or damaged brake shoes.
Regular inspections allow you to detect and address any potential issues before they escalate into major problems. It is important to document the inspection findings and take appropriate action based on the observations.
Cleaning and Lubrication
Cleaning and lubrication play a crucial role in maintaining the performance and longevity of an air brake system. Here are some important aspects to consider:
- Air Compressor: Clean the compressor housing and ensure that the intake filter is free from dirt and debris. Lubricate the compressor as per the manufacturer’s recommendations.
- Air Dryer: Clean the air dryer housing and ensure that the purge valve is functioning properly. Lubricate any applicable moving parts as recommended.
- Air Tanks: Clean the air tanks and remove any accumulated debris or moisture. Inspect and clean the tank drain valves regularly.
- Brake Pedal: Clean the brake pedal assembly and ensure smooth operation. Lubricate any applicable pivot points or linkages.
- Brake Chambers: Clean the brake chambers and ensure that the pushrods move freely. Lubricate the pushrod boots and clevis pins as necessary.
- Brake Drums: Clean the brake drums and remove any brake dust or debris. Apply a light coat of high-temperature brake grease to the contact surfaces.
- Brake Shoes: Clean the brake shoes and ensure that the lining is free from oil or grease. Lubricate the anchor pins and adjusters as recommended.
Regular cleaning and lubrication prevent the buildup of contaminants and ensure smooth and reliable operation of the air brake system components.
Brake Adjustment
Proper brake adjustment is vital for achieving optimal braking performance and ensuring the safety of the vehicle. Here are the steps involved in adjusting the brakes:
- Inspect Brake Adjustment: Measure the pushrod travel to determine if the brakes are properly adjusted. Refer to the manufacturer’s specifications for the acceptable pushrod travel range.
- Adjustment Procedure: If the pushrod travel is outside the acceptable range, follow the adjustment procedure specified by the manufacturer. This usually involves adjusting the slack adjusters or adjusting the brake shoe clearance.
- Verify Brake Operation: After adjusting the brakes, test the brake operation to ensure that the brakes engage and disengage smoothly. Check for any signs of dragging or excessive play.
Regular brake adjustment helps maintain consistent braking performance, reduces brake wear, and extends the life of brake components.
Replacing Worn Components
As brake components wear over time, it is important to replace them to maintain the safety and functionality of the air brake system. Here are some key considerations for replacing worn :
- Brake Shoes: Monitor the thickness of the brake shoe lining. If it is worn beyond the manufacturer’s recommended limits, replace the brake shoes.
- Brake Drums: Measure the brake drum diameter and check for any signs of wear, cracks, or heat spots. If the drum is worn beyond the specified limits or damaged, replace it.
- Brake Chambers: If a brake chamber is leaking, has a damaged diaphragm, or is unable to maintain proper pushrod travel, it should be replaced.
- Other Components: Inspect other components such as valves, hoses, and connectors for any signs of wear, damage, or leaks. Replace any worn or damaged parts.
Replacing worn components in a timely manner ensures the reliability and safety of the air brake system. It is recommended to use genuine OEM or high-quality aftermarket parts for optimal performance.
Safety Precautions for Air Brake System Diagram
When it comes to operating and maintaining an air brake system, safety should always be the top priority. By following proper training and certification, conducting regular system checks, knowing emergency brake procedures, and reporting malfunctions, you can ensure the safe and efficient operation of your air brake system.
Proper Training and Certification
Proper training and certification are essential for anyone operating a vehicle equipped with an air brake system. It is crucial to understand the principles and functioning of the system, as well as the correct procedures for using and maintaining it. By receiving thorough training and obtaining the necessary certification, you can ensure that you have the knowledge and skills to handle the system safely.
One of the key aspects of training is understanding the of an air brake system, such as the air compressor, air dryer, air tanks, brake pedal, brake chambers, brake drums, and brake shoes. Each component plays a vital role in the overall functioning of the system. By familiarizing yourself with these components, you can better understand how they work together to provide reliable braking power.
Regular System Checks
Regular system checks are essential to identify any potential issues or malfunctions in the air brake system. By conducting thorough inspections, you can catch problems early on and prevent them from escalating into more significant safety hazards. These checks should be performed before each trip and include visual inspections, air pressure tests, and functionality tests of various components.
During a visual inspection, you should examine the air tanks, brake chambers, brake drums, and brake shoes for any signs of damage, corrosion, or leaks. Additionally, you should check the air compressor and air dryer for proper functioning and ensure that there are no loose or worn-out connections.
To test the air pressure, you can use a pressure gauge to measure the pressure in the air tanks. This will help you determine if the system is pressurizing correctly. Furthermore, you should perform functionality tests of the brake pedal and brake chambers to ensure they are engaging and releasing properly.
Emergency Brake Procedures
In emergency situations, knowing how to effectively apply the brakes can make a significant difference in preventing accidents. Understanding the emergency brake procedures is crucial for maintaining control of the vehicle and ensuring the safety of yourself and others on the road.
When faced with an emergency situation, the first step is to apply firm and continuous pressure to the brake pedal. This action will trigger the brake chambers to engage and create friction between the brake shoes and the brake drums, resulting in rapid deceleration.
It is important to remember that emergency braking may cause the vehicle to skid or lose control, especially if the brakes are applied abruptly on slippery surfaces. Therefore, it is essential to maintain a firm grip on the steering wheel and steer in the direction you want the vehicle to go.
Practicing emergency brake procedures in a controlled environment, such as an empty parking lot, can help you develop the necessary skills and muscle memory to react quickly and effectively in real-life situations.
Reporting Malfunctions
Even with regular system checks and proper , malfunctions can still occur in an air brake system. It is crucial to report any malfunctions or abnormalities promptly to ensure that they are addressed and fixed before they compromise the safety of the vehicle.
If you notice any signs of air leakage, such as hissing sounds or a significant drop in air pressure, it is important to address the issue immediately. Air leakage can lead to a loss of braking power, making it dangerous to operate the vehicle.
Similarly, if you experience insufficient braking power or excessive brake drag, it is essential to report these issues. Insufficient braking power can result in longer stopping distances, while excessive brake drag can cause overheating and premature wear of the brake components.
By reporting malfunctions promptly, you not only ensure your own safety but also contribute to the overall safety of the roadways. Your report can help prevent accidents and prompt necessary repairs or replacements of worn or faulty .
In conclusion, safety precautions are paramount when it comes to operating an air brake system. By obtaining proper training and certification, conducting regular system checks, knowing emergency brake procedures, and reporting malfunctions, you can ensure a safe and reliable braking experience. Remember, safety is everyone’s responsibility, and by taking the necessary precautions, you contribute to a safer road environment for yourself and others.